This site is an attempt to document the process of rebuilding a 1965 Honda CB77 Superhawk. I have chosen to complete the restoration with the help of a few of my students at a project based learning school in San Diego, Ca. The restoration takes place in my 12th grade mathematics classroom during lunch and after school.
Why the superhawk? I'm a motorcycle enthusiast and really enjoy learning about and restoring old bikes. I feel these machines are part of history and deserve to be put back on the road again (especially after sitting for 30+ years). These bikes also represent innovations of that particular time and this Superhawk was ahead of its time. Old bikes have character, they are sometime fussy, and they demand the riders attention. For my money, there are few things cooler than having a vintage or antique motorcycle that runs, looks and performs as it should.
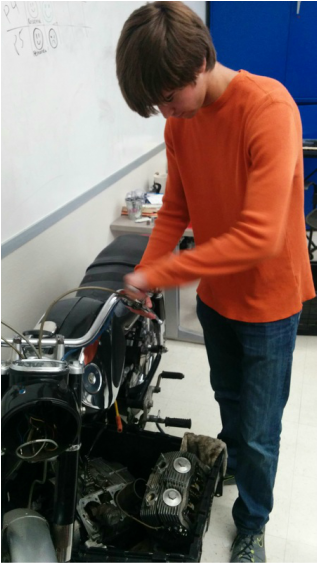
This bike will be an opportunity for me to learn and to teach 3-4 students about the simplicities and complexities of motorcycle maintenance. This 305cc engine is simple, yet get one seemingly minor component misaligned or carelessly miss a locating pin and disaster can and will strike. The goal is to learn together, troubleshoot together, and to get a feeling for mechanics, how to use tools creatively, to understand the inner workings of a motorcycle, and to gain confidence that they, if they put their minds to it, can be industrious and fix things for themselves.
About Superhawk:
The CB77 305cc was made from 1961-1967 and had many features that were innovative for the time which set them apart from much of the larger british and American made bikes. These bikes had an electric start, overhead cams, a horizontally split case, the engine was an integral component to the frame which had no downtubes that typically cradle the engine. This was Honda's first race bike capable of speeds up to 100mph. I also read that it was capable of 100mpg (going 26 miles an hour with the wind at your back) but 65mpg is a reasonable estimation.
Look which bike made the short list of most iconic bikes (fourth one down)
Why the superhawk? I'm a motorcycle enthusiast and really enjoy learning about and restoring old bikes. I feel these machines are part of history and deserve to be put back on the road again (especially after sitting for 30+ years). These bikes also represent innovations of that particular time and this Superhawk was ahead of its time. Old bikes have character, they are sometime fussy, and they demand the riders attention. For my money, there are few things cooler than having a vintage or antique motorcycle that runs, looks and performs as it should.
This bike will be an opportunity for me to learn and to teach 3-4 students about the simplicities and complexities of motorcycle maintenance. This 305cc engine is simple, yet get one seemingly minor component misaligned or carelessly miss a locating pin and disaster can and will strike. The goal is to learn together, troubleshoot together, and to get a feeling for mechanics, how to use tools creatively, to understand the inner workings of a motorcycle, and to gain confidence that they, if they put their minds to it, can be industrious and fix things for themselves.
About Superhawk:
The CB77 305cc was made from 1961-1967 and had many features that were innovative for the time which set them apart from much of the larger british and American made bikes. These bikes had an electric start, overhead cams, a horizontally split case, the engine was an integral component to the frame which had no downtubes that typically cradle the engine. This was Honda's first race bike capable of speeds up to 100mph. I also read that it was capable of 100mpg (going 26 miles an hour with the wind at your back) but 65mpg is a reasonable estimation.
Look which bike made the short list of most iconic bikes (fourth one down)
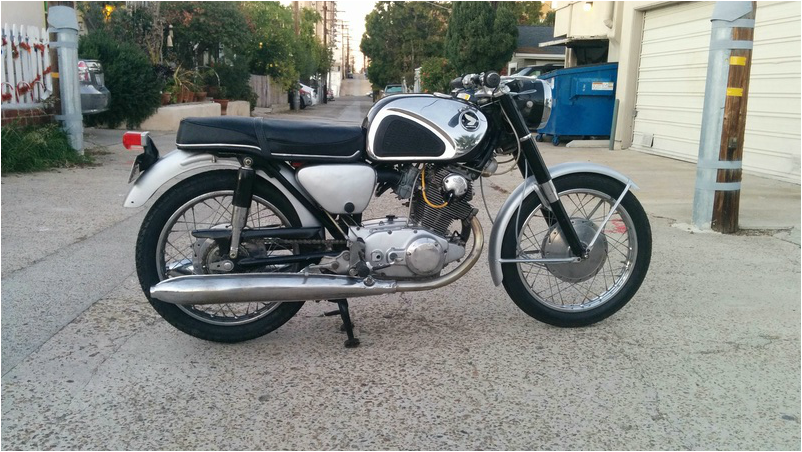
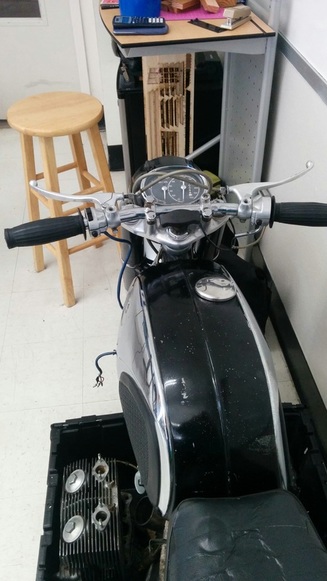
Well, here it is...The bike to be restored.
The bike was a Los Angeles craigslist purchase. I drove up in the evening fighting through the Los Angeles rush hour traffic which seems to start at noon and go to about Midnight. After a long journey I dropped the bike off in my classroom around 10pm completely exhausted. Here is... the original condition of the bike from when I first dropped it off. The chrome was in great shape and it "seemed" to be all there, but after further inspection it was missing a number of parts and/or parts were incorrect for this model which led to a lot of frustration later on. But live and learn I guess?
THE BAD:
A seized engine. In fact the previous owner (who wanted to restore the bike) attempted to free the cylinders from the pistons but was unable to after many unsuccessful attempts. The plan now is to free the seizure, and do a complete engine rebuild.
THE BAD:
A seized engine. In fact the previous owner (who wanted to restore the bike) attempted to free the cylinders from the pistons but was unable to after many unsuccessful attempts. The plan now is to free the seizure, and do a complete engine rebuild.
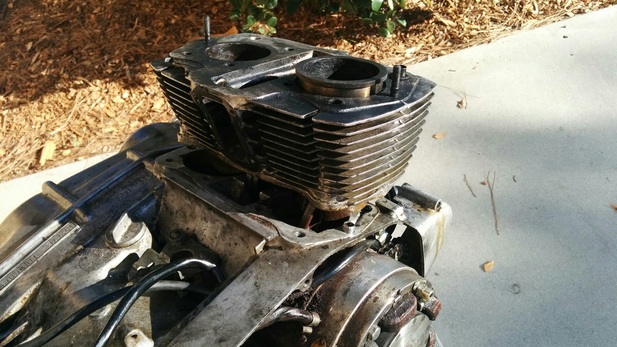
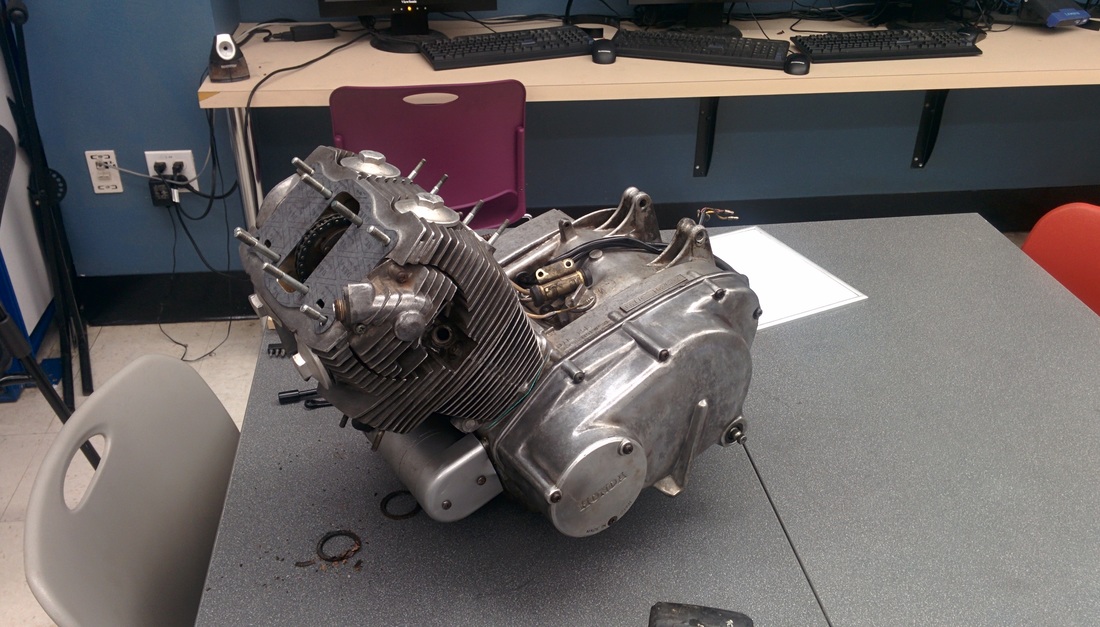
This engine was FROZEN! I'm thinking this engine was starved of oil and seized and then allowed to sit for 30 years because it was not budging. The previous owner tried lighting it on fire with a mixture of gas and magic mystery oil and when that didn't do the trick attempted to drill out the piston.
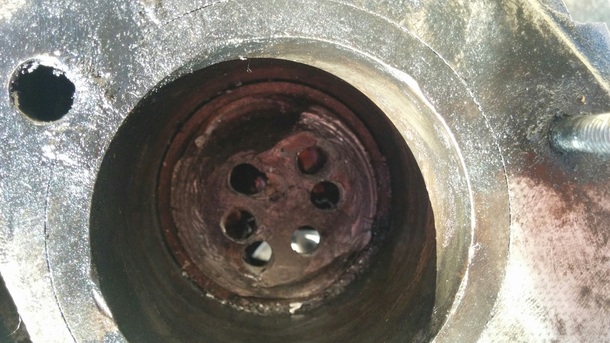
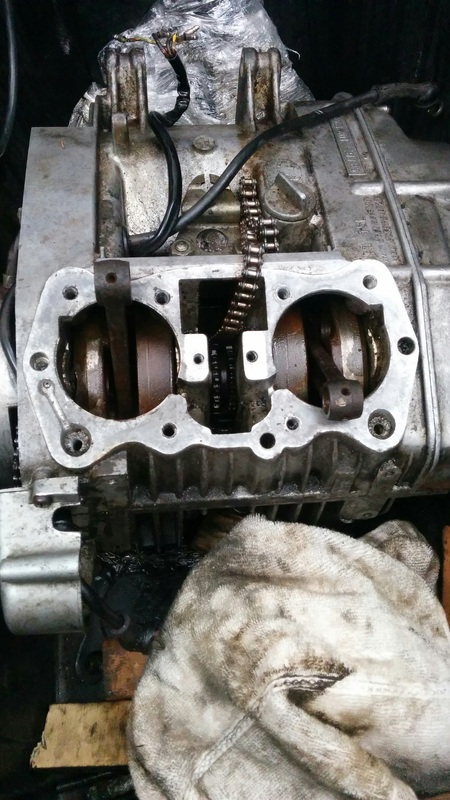
Top view of the seized piston. Since the piston was drilled it is inevitable that metal shavings made their way into the crankcase. This means that we will have to split the case and remove any damaging metal bits and while we're in there examine the engine internal organs. This was fine as this bike was inoperable for so long that it only makes sense to go through everything while the engine is out of the bike.
WE ARE FREE! well mostly

In our first meeting we were able to remove the cylinders. How did we do it? One method is to use a steering wheel puller, but I realized that there were broken fins and that the cylinders and pistons were not salvageable, so a torch and a large hammer was used to break everything free. It took A LOT of persuasion and about an half hour of heat and tapping the cylinder with a hammer. It was so seized that the cylinder sleeve remained on one of the pistons. To get this off I used a dremel and cut the sleeve around the wrist pin and then knocked the wrist pin out. But alas it was free and we were able to move on with the disassembly.
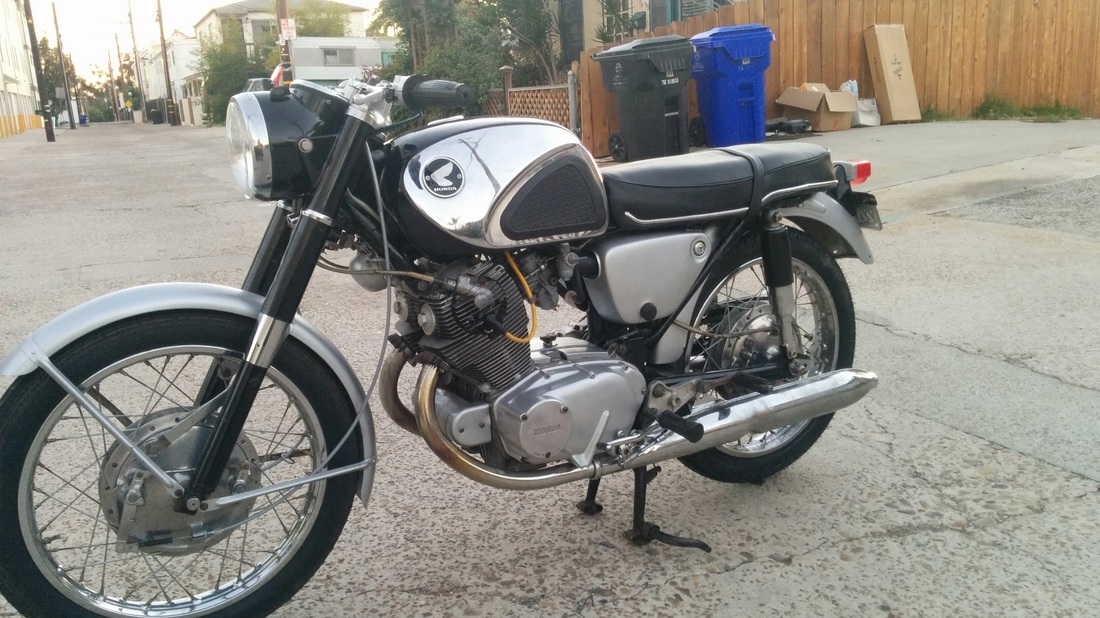
While waiting for gaskets and seals for the engine. Ryan helped swap out the wacky tall bars that were on the bike for some flat bars which give the bike a more aggressive race look.
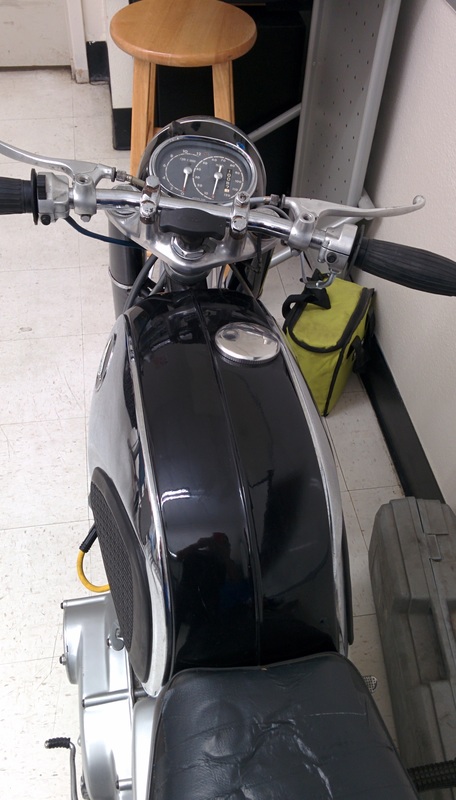
The shorter bars gave a better look and more aggressive riding position. Although all of the control cables are now about a foot too long. So we'll be ordering new cables. Side note: I love the look of the speedometer and tachometer built into the headlight bucket.
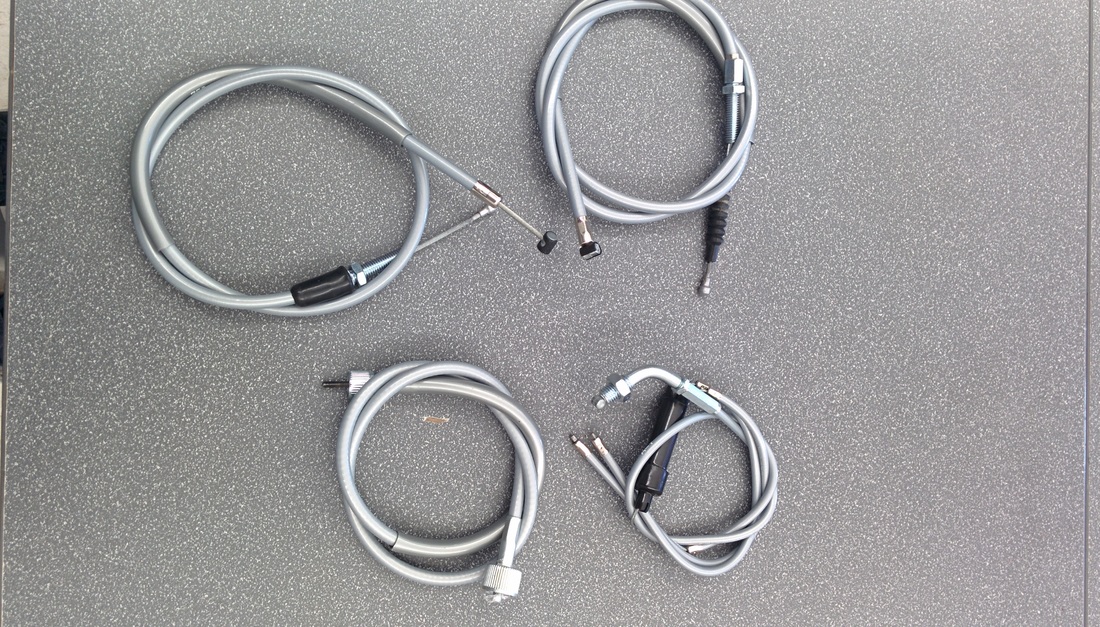
I ended up ordering a set of reproduction cables from Thailand. I was under the impression that it included all of the cables since it said "complete set" but come to find out it did not come with the rear brake cable nor the tachometer cable. Even worse the clutch cable was for clip on bars and was too short but also had the wrong screw thread where it meets the engine. If you are doing one of these restorations be forewarned.
I ended up ordering a set of reproduction cables from Thailand. I was under the impression that it included all of the cables since it said "complete set" but come to find out it did not come with the rear brake cable nor the tachometer cable. Even worse the clutch cable was for clip on bars and was too short but also had the wrong screw thread where it meets the engine. If you are doing one of these restorations be forewarned.
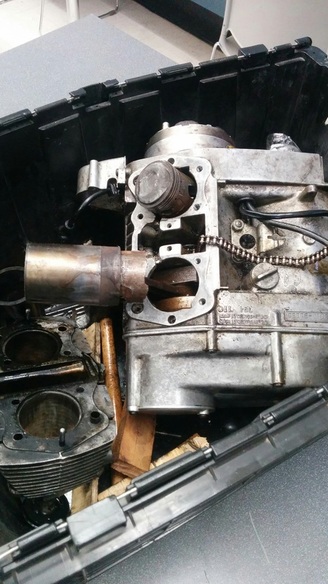
Now that the pistons are out disassembly can continue. It's unavoidable to split the case as there's a lot of metal shavings inside the from having the pistons drilled.
This was the condition of the paint. We decided to paint it with the original "Cloud Silver" while cleaning up rust. I had hesitated to paint the bike as I thought it was original paint. I found out later on that it had been painted at some point so I felt good about giving it a better paint job.
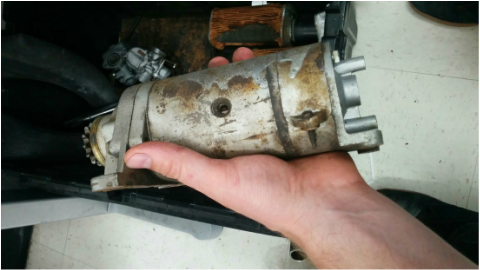
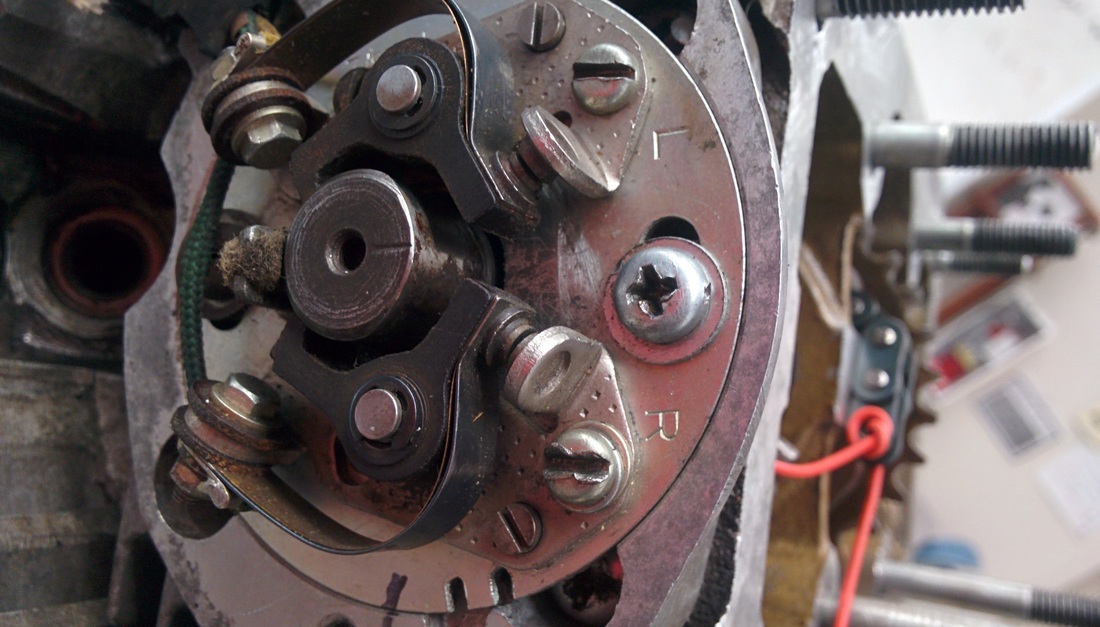
We discovered that the starter was missing a screw, which made me think that someone had tampered with the starter (maybe it didn't work?) It certainly wasn't going to work without the screw. So we disassembled the starter. Surprisingly the inside components looked pretty good, the brushes were clean and there wasn't too much grime on the inside. We greased up the orbital gears and cleaned up what we could. It was a struggle to get everything back in place due to the spring action on the brushes, the technique is to come in at an angle, push the brushes into place and then slide it forward the rest of the way.
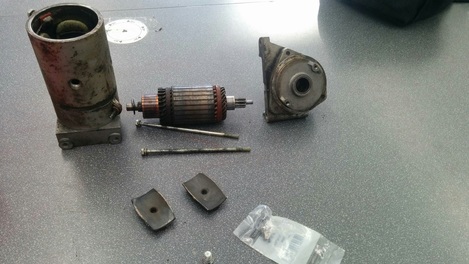
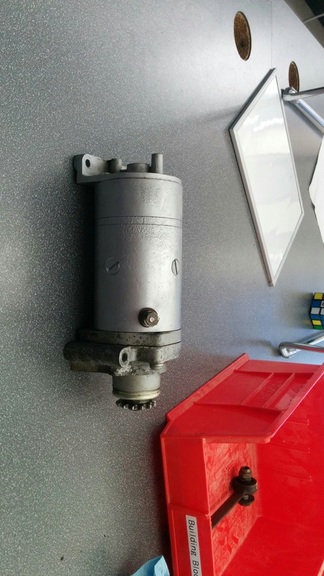
The starter motor reassembled, cleaned up and painted. We hooked the starter up to 12 volts and nothing spun. I ended up taking it apart two more times before I tried hooking it up to a REAL battery and it SPUN! The starter motor works!
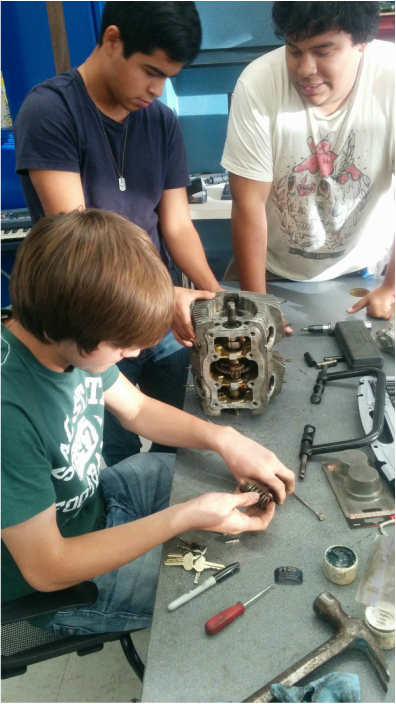
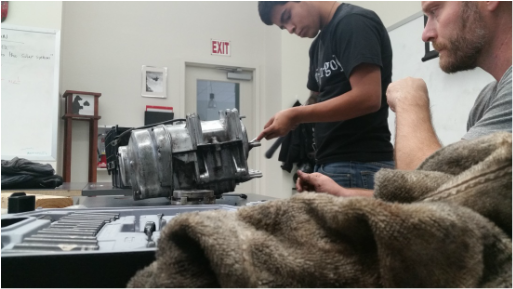
Ryan, Carlos, and Tai begin tearing down the head so we can lap the valves. I brought in a number of tools from home but we have also been borrowing from the engineering class. I really appreciate Brendan the engineering teacher for letting us use his tools and for putting up with me asking where things are located. Brendan you're the man! Instead of lapping the valves by hand we hooked each valve up to a drill by using a piece of fuel line connected to the valve and wrapped around a drill bit.
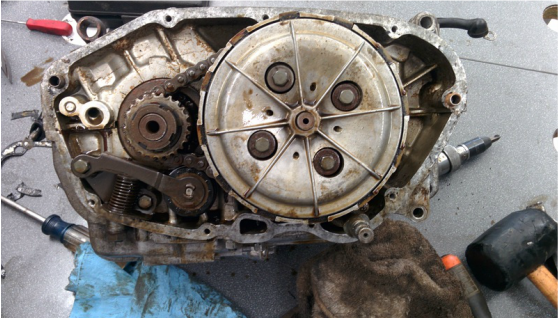
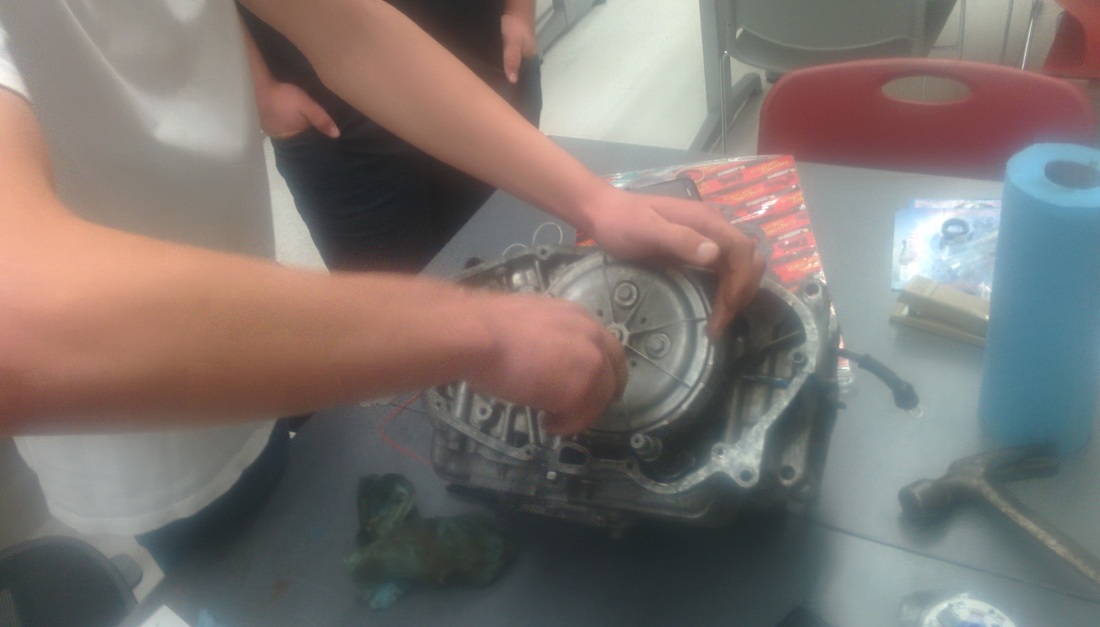
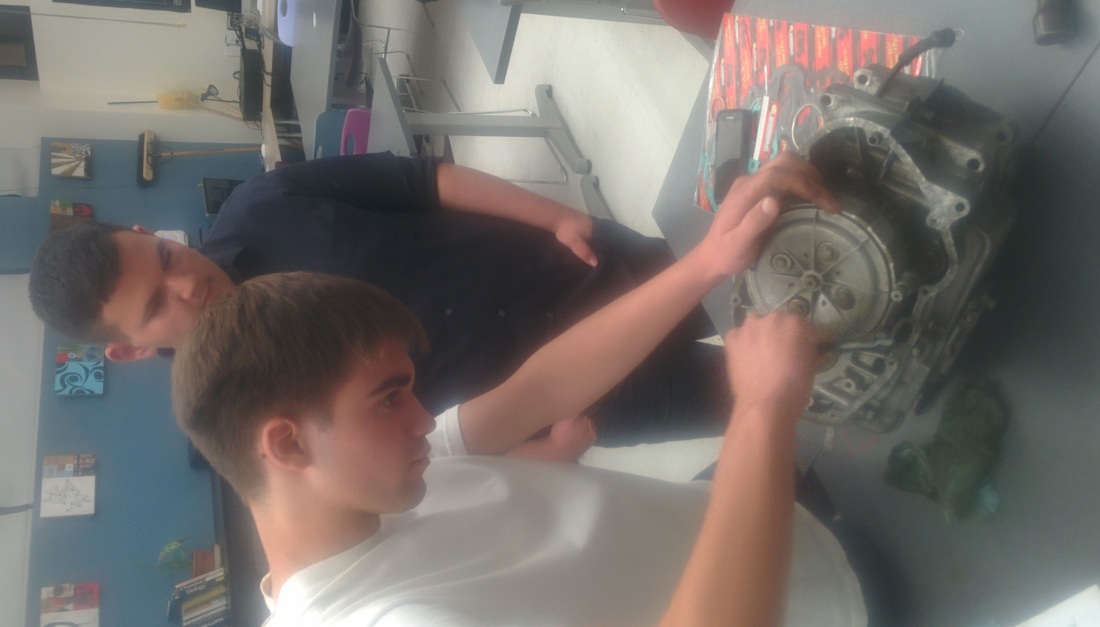
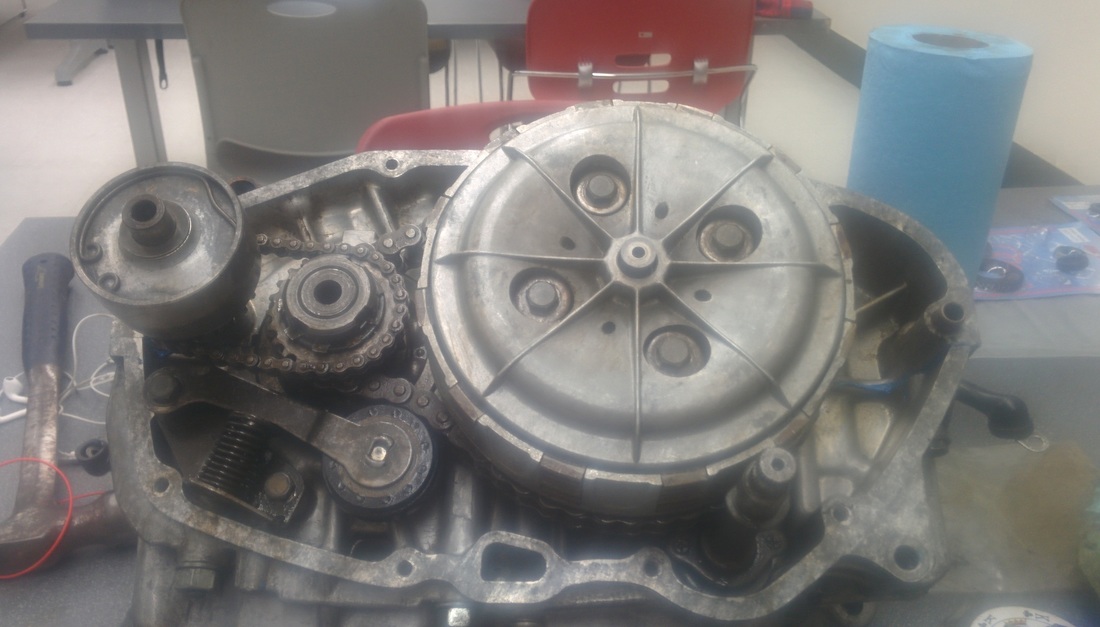
The side engine cover is removed. The clutch basket and shift mechanisms are coming out. The use of an impact driver is invaluable on these old bikes.
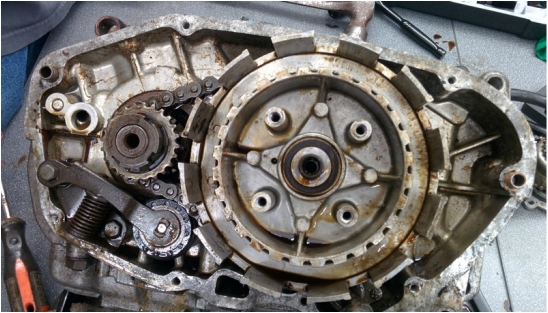
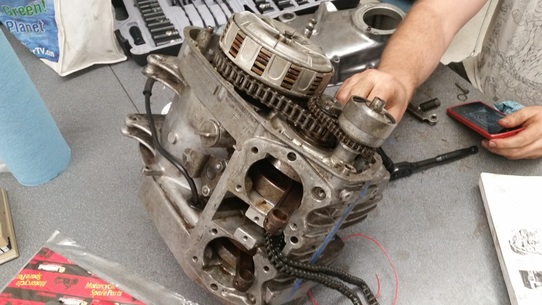
Carlos and Ryan disassembled the clutch and we found that all the plates were stuck together. There are also two retaining wires that hold the last plate and the basket assembly in place. Next we used a dull chisel and hammer to remove the large nut on the crankshaft.
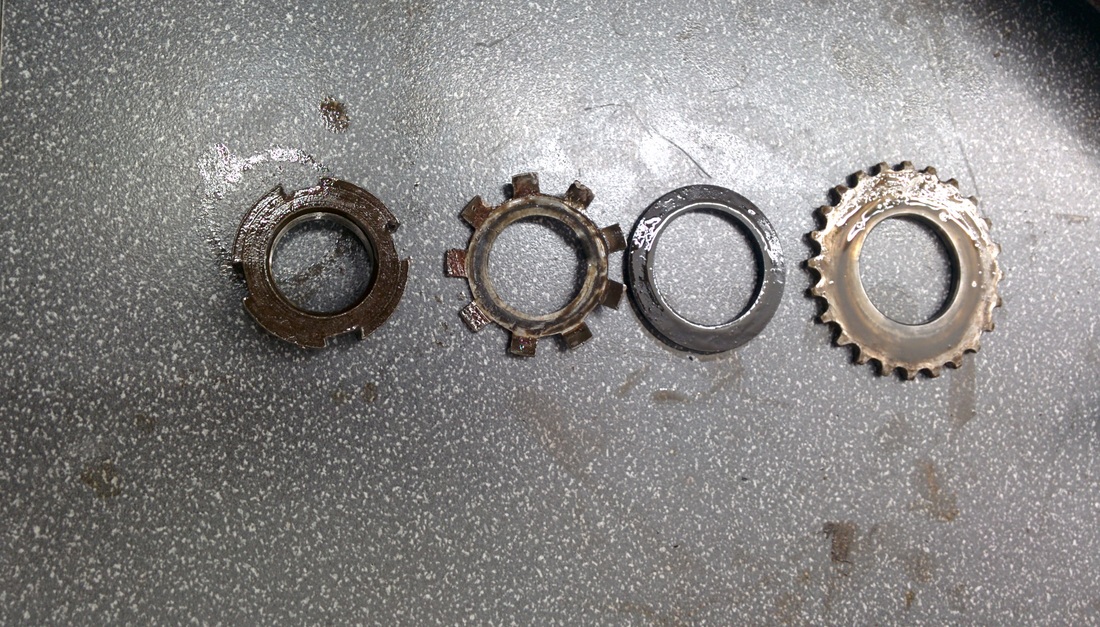
Order matters. I'm teaching the students to think about how things go together and what the particular function is of each component. But, we also take pictures to help remember the order things go in. These pieces then get transferred into a labeled plastic bag until we need them again during assembly. I think this is good practice and it definitely makes the assembly go easier. I've found that if I don't do this a lot of time is wasted just searching for a particular part instead of a labeled bag with all the necessary pieces ready to go. .
The disassembly of the shift mechanism.
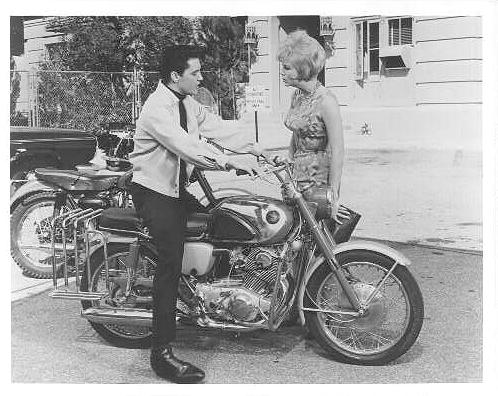
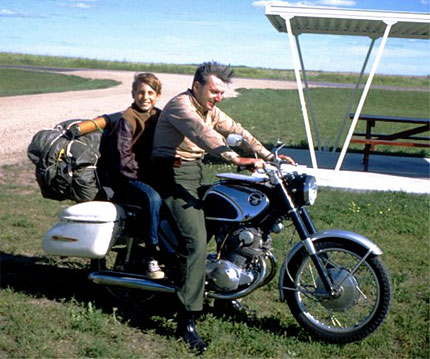
The CB77 seemed to be fit for a king and was also the mode of transportation for Robert Pirsig and his son during their cross country trip which inspired Zen and the Art of Motorcycle Maintenance. These are the details which I enjoy about these old bikes, stories add character to the bike and I look forward to creating my own,
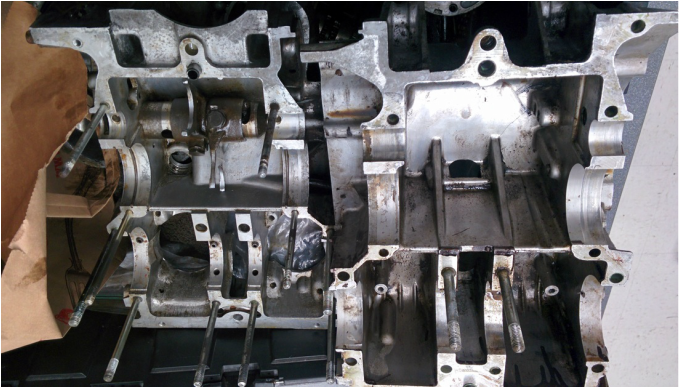
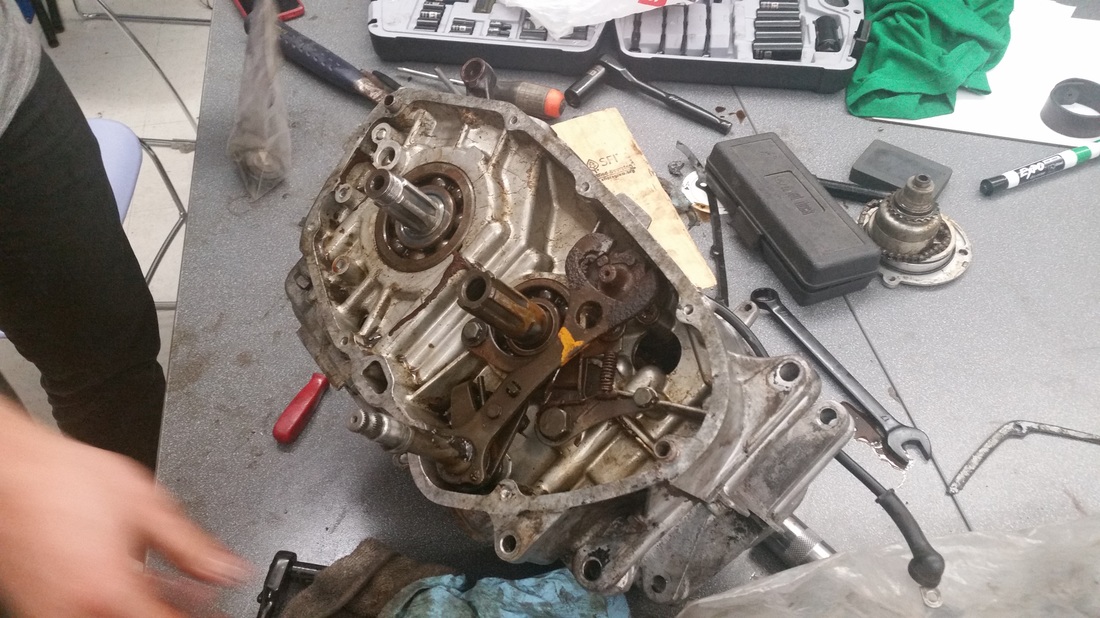
The inside of the engine case with the crank and transmission removed. We had to clean out metal debris from the drilling of the piston. There wasn't too much sludge at the bottom. I later brought the engine to my friend Bill Silver (Mr. Honda) who is the 305 guru to check the operation of the transmission. I thought it was shifting fine as the overlap of the gear dogs seemed to be correct (at least 50%) but Bill showed me that you have to separate the gears by hand to get an accurate measurement and sure enough the overlap wasn't what I though. Luckily he happened to have some offset gear cotters which act as spacers and allow the gears to more fully overlap. Under 40% the tendency is for the gears to "jump out" which happened to me when I build a 305 Dream a couple years back. I also picked up a complete gasket and seal set, a new set of carbs since the ones that came off the bike were actually from the 250cc Cb72 model and would not work on the Superhawk.
ASSEMBLY BEGINS!
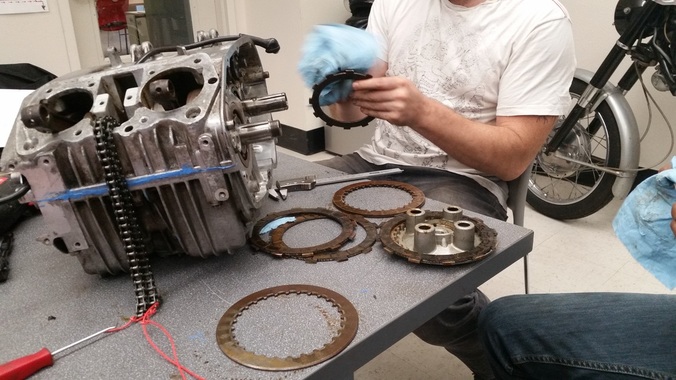
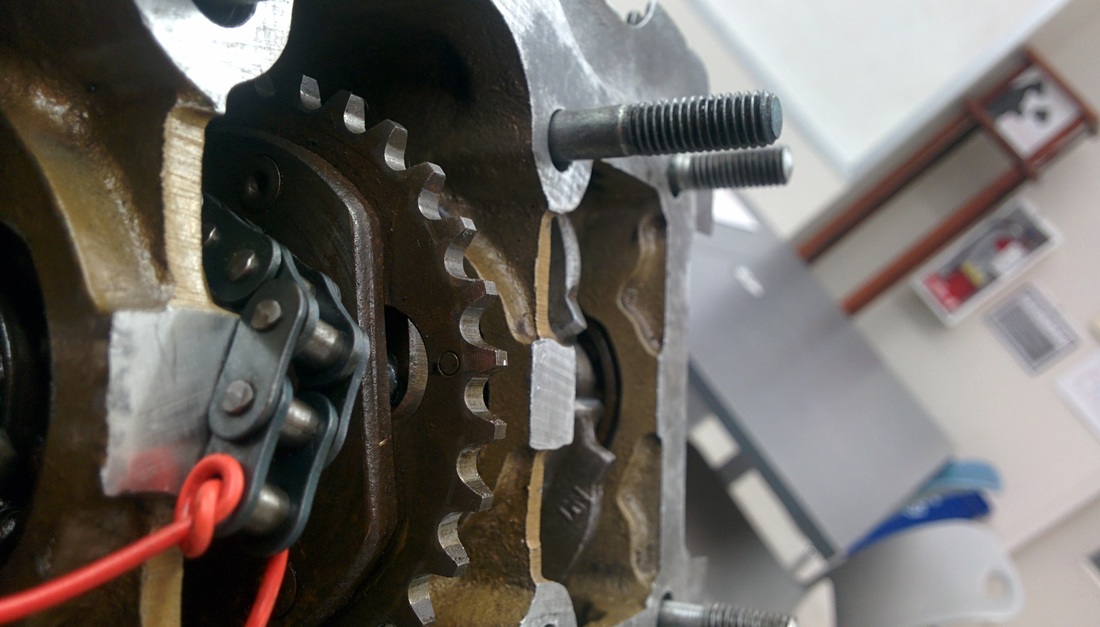
I apologize for the lack of pictures but once I get on a roll I tend to forget to snap pictures. We replaced the brass bushing in the transmission, replaced all of the seals, and cleaned the inside. We lined up the locating pins on the crank and transmission gearing, painted on some gasket maker and reunited the two cases. Here we are cleaning up the clutch friction and metal plates. They were glued together from sitting for so long. As a precaution I always run a wire through each side of the cam chain, so if the chain slips back into the case you can simply pull it back up.
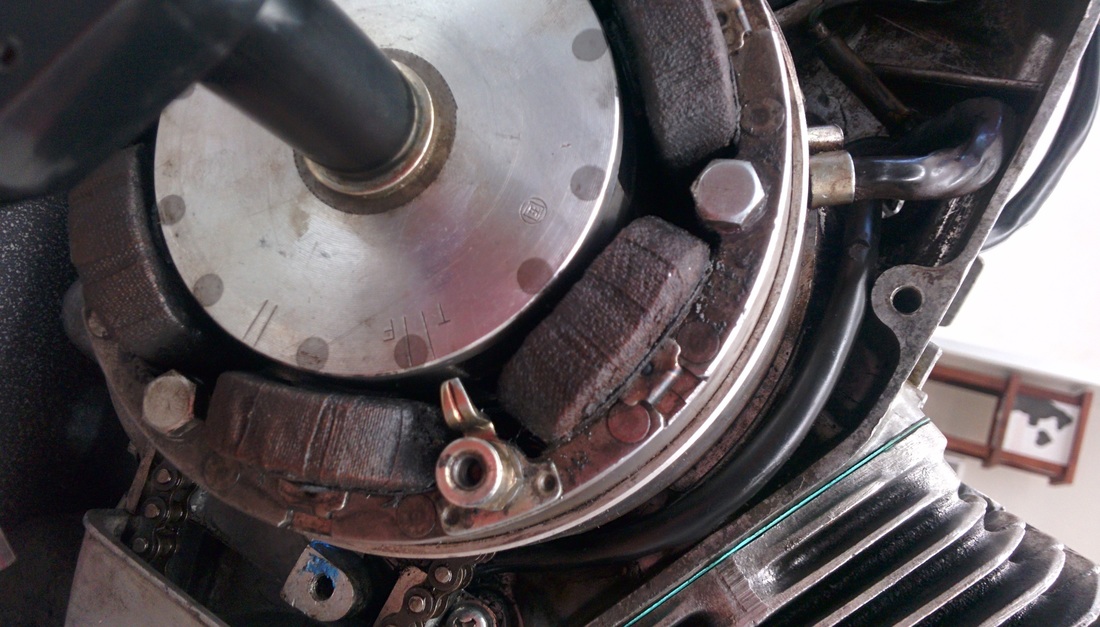
Carlos and I are getting ready to instal the starter chain and stator. We replaced the starter clutch springs as the old ones were definitely compressed and had lost their ability to keep tension on the rollers.
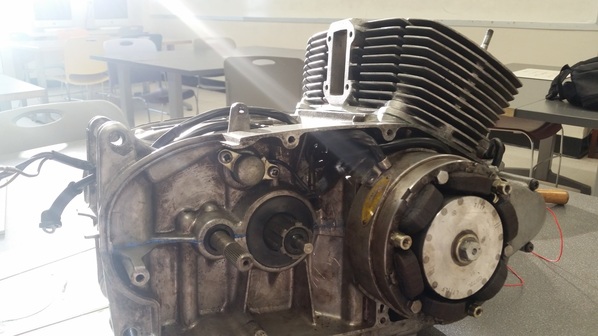
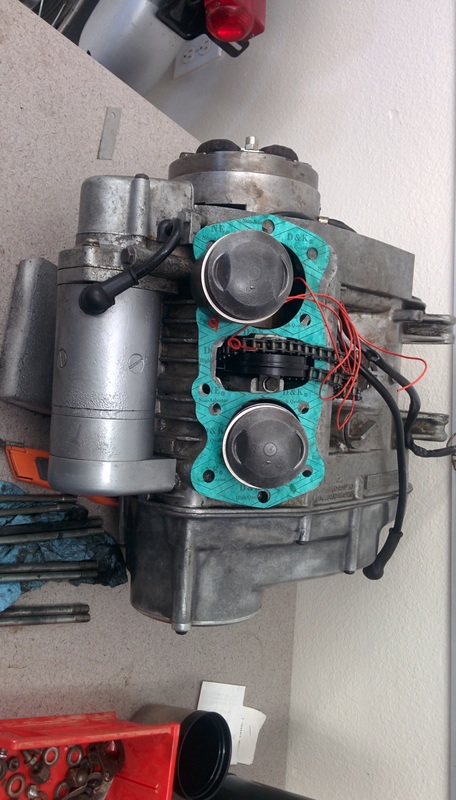
Above, installing the centrifugal oil filter. Below piston and cylinders back on and all new seals and gaskets in place.
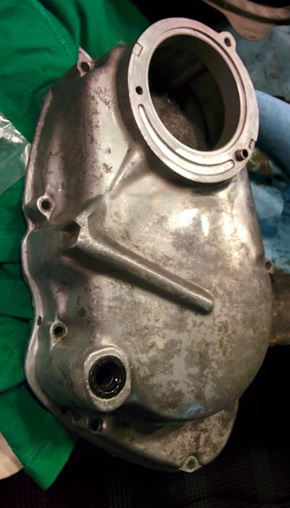
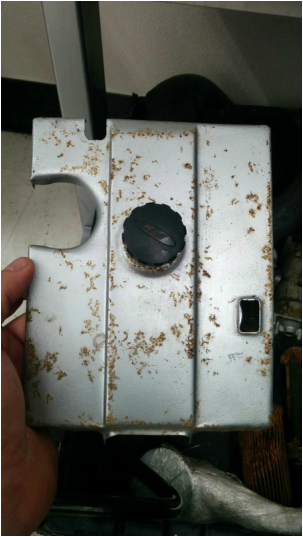
The cover before it was cleaned up and painted
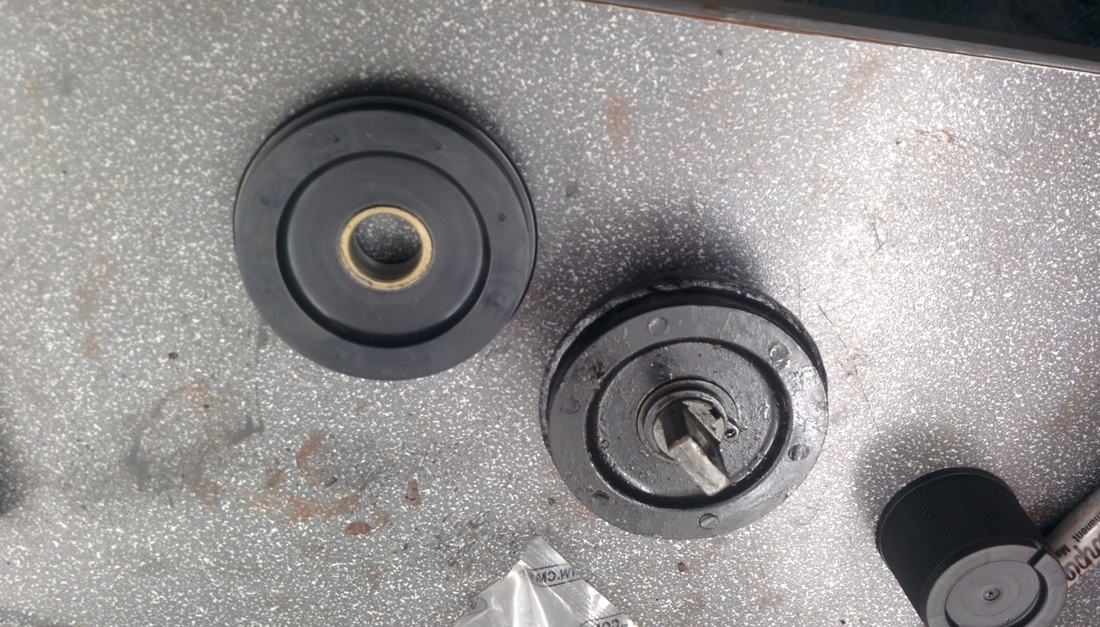


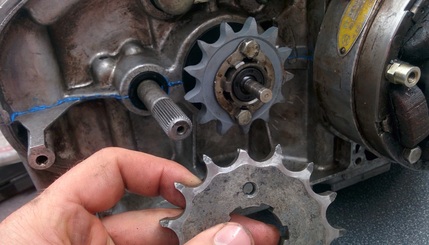
Call the dentist this sprocket has some pretty bad teeth. I didn't do enough research and mistakenly ordered a 13 toothed sprocket as a replacement. I noticed the difference right away when compared to the old sprocket. The 13 in is good for drag racing and not much for highway speed, so that was pulled off and replaced by a new 15 tooth sprocket.
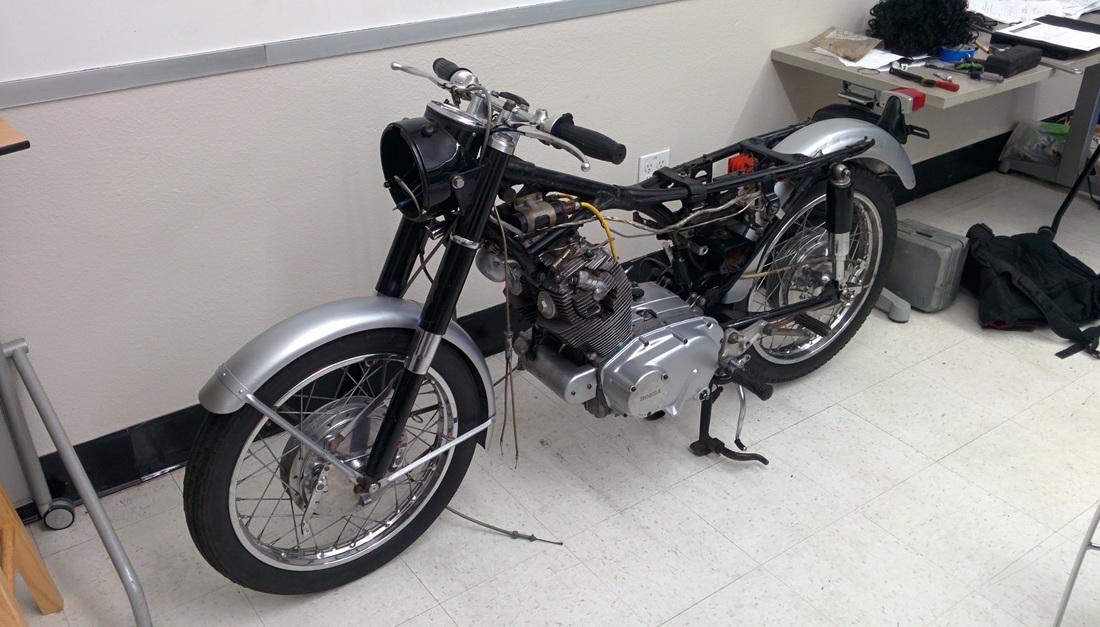
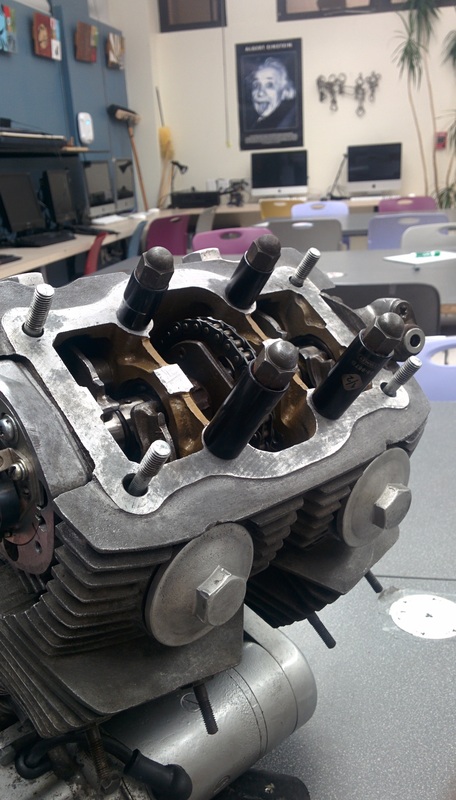
It's starting to look like a real motorcycle.
Fast forward. The electrical was pretty straight forward although I did have an issue with one of the spark plug wires and cap. The coils passed the resistance test and we managed to get all of the lights and horn working. We did wire in a new non OEM ignition switch and it was interesting figuring out which post each wire went to. Throttle and clutch cable routing took some research to get right, and we ended up replacing all of the small bulbs inside the headlight bucket which illuminate the neutral position, tach and speedometer. The headlight only worked on high beam and it was the old style which is sealed. Luckily, a friend had given mae an aftermarket headlight bucket with headlight. The headlight turned out to be an exact fit for the superhawk and it was not a sealed type so replacement of a bulb in the future would be easy.
A new paint job on the tank. Now we are waiting for a new seat cover and rear tube and tire. It seems as though every little thing needs to be fixed, for instance the gas cap wouldn't screw on. I noticed that the inside lip of the tank was bent downward, a pliers and some straightening and it's functional again.
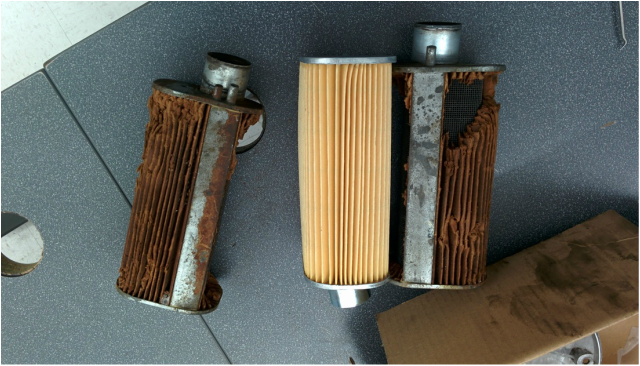
New verses the old air filters. I know you say they still have life in them but I decided to replace them anyway ;)
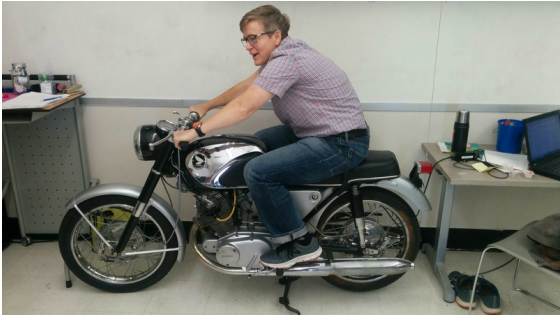
After seeing this bike, my co-worker and good friend Rachel decided that she needs to test it out. After looking at this picture it I knew that I would never look this good while riding the superhawk. The Fonz is got nothing on her.
Tragedy strikes!!!
When starting the bike for the first time we were successful to get it to run on the left side only. I was getting spark from both sides and fuel, but I couldn't do a compression test because of a bad schrader valve on my compression tester. I decided to switch spark plugs to check if the problem would switch sides, I noticed that one of the plugs wasn't seating properly so I tightened it down. I started the engine and heard PING-PING=PING=PING and I thought to myself OH NO!!!. After pulling the spark plug out it was demolished. I had feared that the piston came in contact with the sparkplug and damaged the piston. Luckily it ended up being the intake valve that hit the spark plug (well not that lucky). The bad news is that after a compression test, the intake valve was determined to be bent. What had happened was the bike came with NGK D8ES spark plugs which are the extended thread and TOO LONG for this bike. The correct plugs are the NGK D8HA and I feel like a fool for not noticing. I just figured they had to be correct if they came off the bike. So the bike will have to have the engine removed in order to replace the right intake valve and install the CORRECT spark plugs.
After too much coffee over an hour and a half I had the engine out of the bike to replace the bent valve. Throughout this process there has been an unsung hero, my friend Bill Silver ("Mr. Honda"). Not only has he helped me inspect the engine he has supplied me with so many of the parts that we needed for this bike. When I have a question or am really stumped he always comes through with great suggestions and things to look for. He has personally taught me how to rebuild the 305 bikes and I'll always be grateful. The new valve came from the Silver collection of parts.
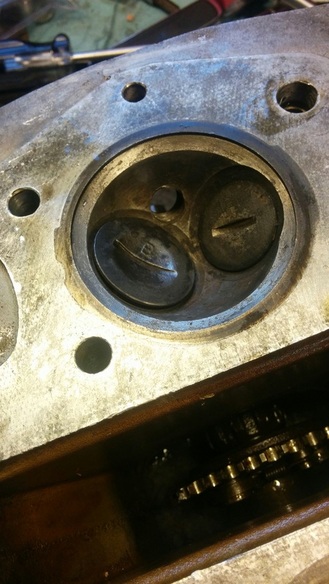
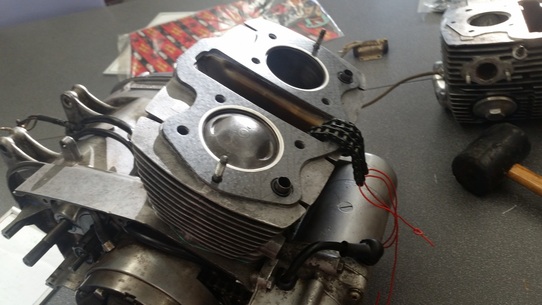
You can see the bent valve (the one with the "B") as it won't seat all the way. Without the valve seating and trapping the air there is no compression. No compression = no combustion = no function.
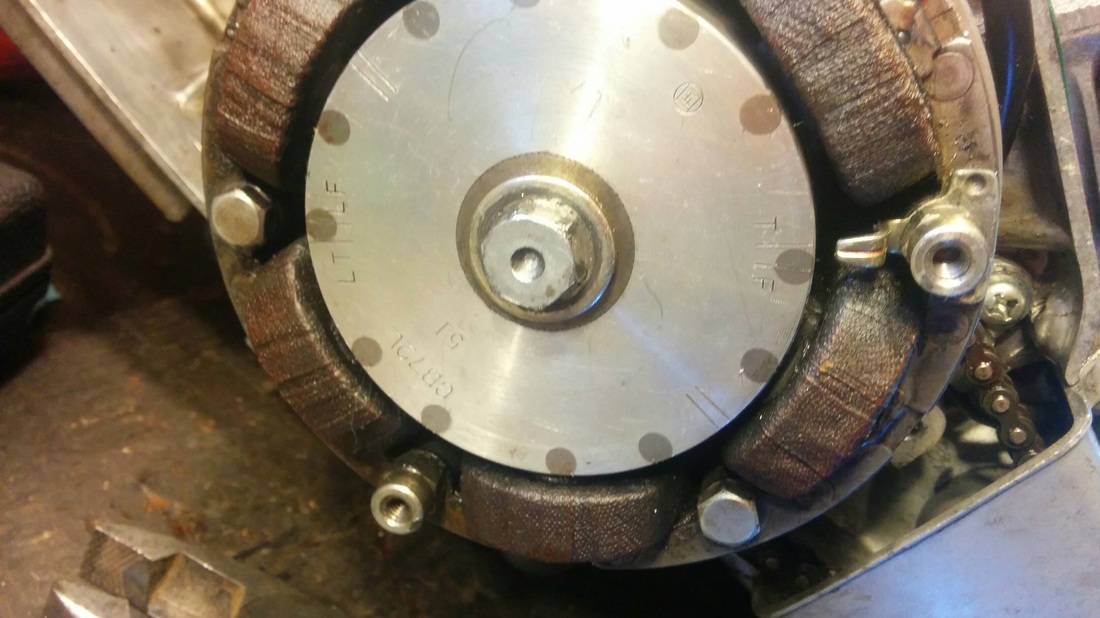
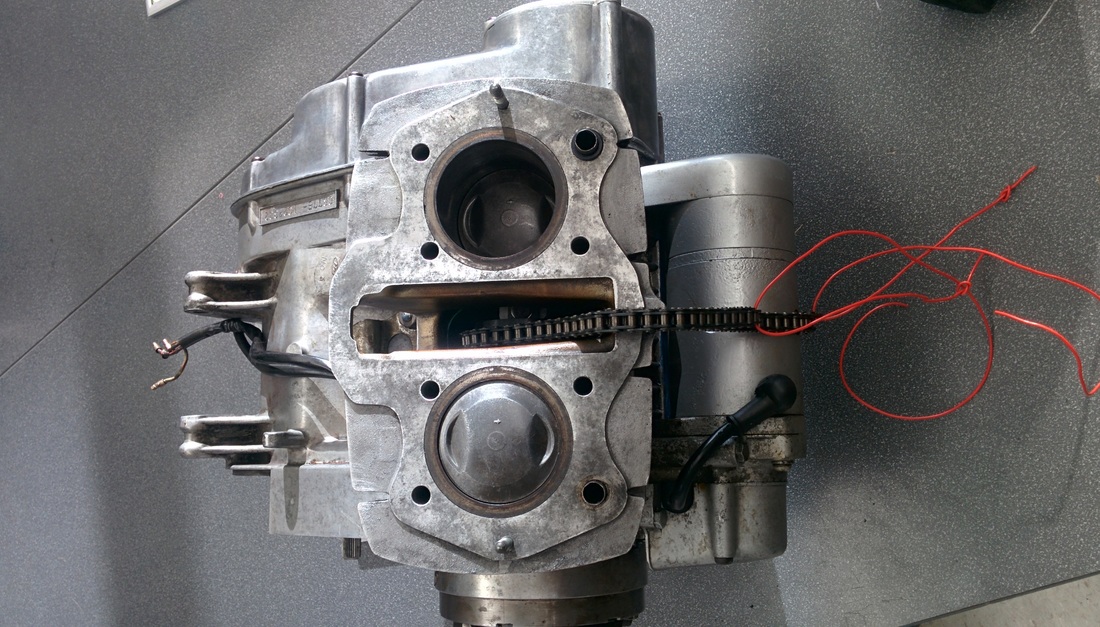
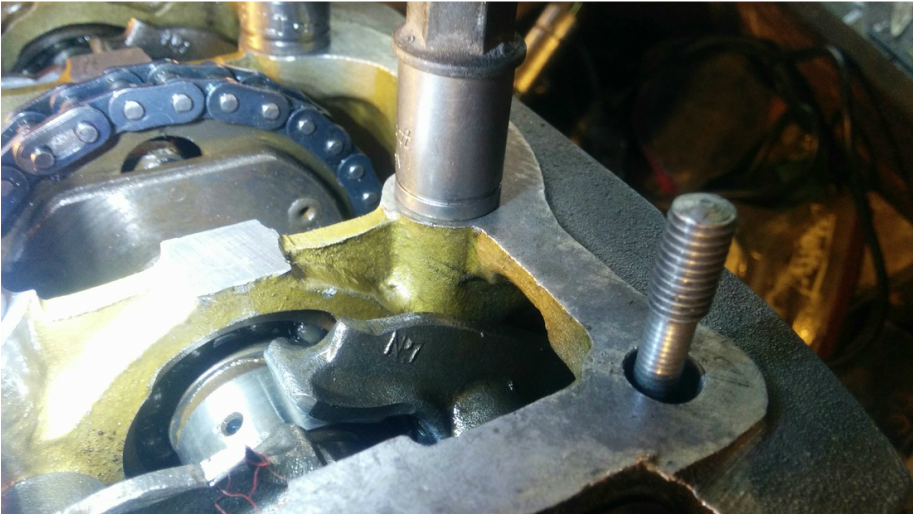
Above and below are two crucial timing alignments. Above the "T" for top dead center on the right side must be lined up exactly with the pointer as seen in the right of this picture. Below the round circle (barely visible in this picture) must be dead center and flush with the top of the head. You can see the dot if you look to the top of the cam chain and then straight down on the flattop metal piece. I also used a couple Bill Silver tricks here, one was to use the valve adjustment screws to "hold" the cam in place so it doesn't rotate while putting the cam chain on. The other was a trick to installing a new cam chain as it can be tough to put in the master link (it seems a link too short). He suggested using sockets with a nut on top to snug the entire top end down getting rid of the extra space which prevents the chain from coming together.
Back together again.
I went to start it and I noticed there was a lot of fuel coming from the right hand side. It turns out that the right carb was missing the brass needle jet fitting in which the needle sits in. It also had a leaking petcock which kept draining fuel into the carbs. The brass piece was scavenged from the incorrect cb72 carb set that came with the bike. Bill had the 4 hole petcock rubber and two new float bowl gaskets. He also showed me how to set the carbs correctly on this particular model.
I went to start it and I noticed there was a lot of fuel coming from the right hand side. It turns out that the right carb was missing the brass needle jet fitting in which the needle sits in. It also had a leaking petcock which kept draining fuel into the carbs. The brass piece was scavenged from the incorrect cb72 carb set that came with the bike. Bill had the 4 hole petcock rubber and two new float bowl gaskets. He also showed me how to set the carbs correctly on this particular model.
WE HAVE A RUNNER!
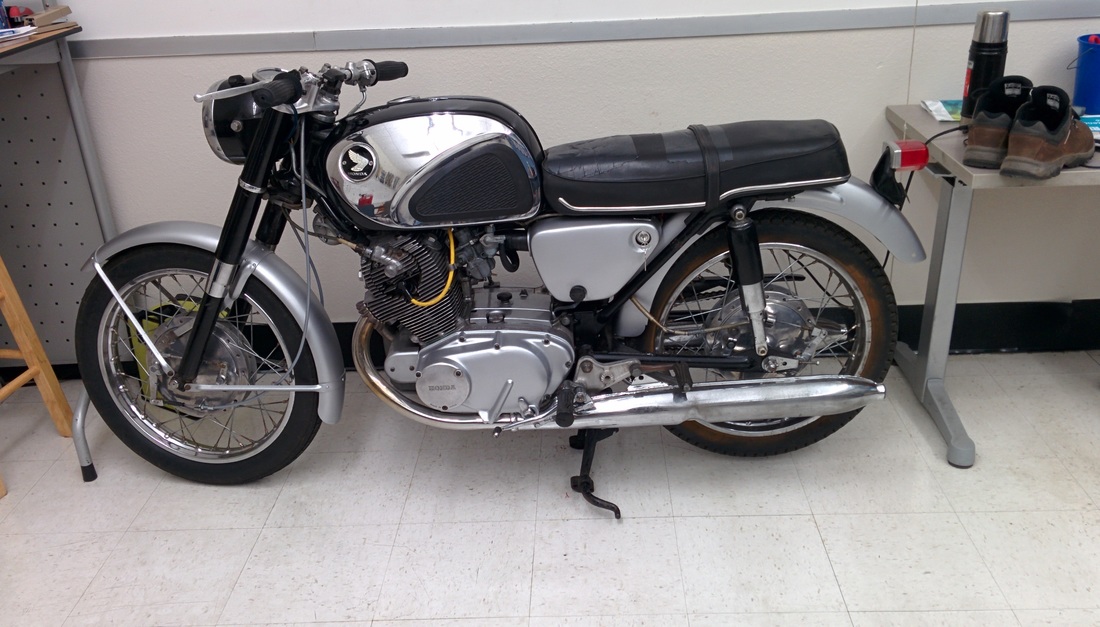
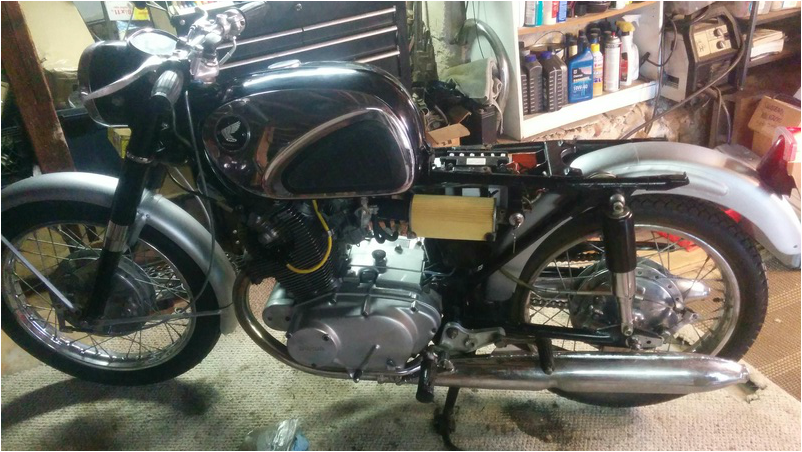
After fixing the carb issue and making all of the adjustments I fired the bike up. And straight away it ran well. I did a little fiddling with the air screws on the carburetors and then adjusted the idle screws so that it ran the same on both sides. After spending quite some time trying to get it running right it sounded like a symphony of things working together in unison. The bike now runs, shifts and does everything as it should. What I'm impressed by is how quick the little bike is and how well it does in higher rpm's. You can really wind this little bike out and it is capable of highway speeds even here in Southern California! This was one of my favorite restorations as I got to share the learning with the students.
Final pics of the bike